Fake anime screenshot tutorial
- Mushka

- 8 may 2020
- 4 Min. de lectura
Hey there guys! Mushka here! Has been really a while since I used this shitty blog lmao But if you’re also here that means you clicked on that delicious Puppet and wanted to know how to get that effect. First, let me tell you this is a tutorial made with Ibis, so if you don’t have it that’s ok, as long as you have a program that has Gaussian blur it’s fine.
Alright, so first step is to choose the size of your canvas, which must be 768x1280px or the 9:16 option on Ibis.

Now, sketch your character.

I chose Puppet because he’s (bae) fairly easy to draw. Ironically, anime is quite “static” when it comes to a character’s pose. Still, if you want to go for more movement then it’s fine, but for this tutorial I’ll be making something simpler to make things a little bit easier to explain (and because I’m a lazy piece of shit)
Next is lineart. I changed the color of the sketch so it’d be easier to see my black lineart. Now, there are a few things to take into consideration for this step.
· Use dip hard pen.
· Use size 1.3 -1.4
· Don’t use thin ends
· Don’t use the pressure option (I mean, the lines should not be faded)
· Use layers!
· Don’t leave blank spaces.
· Make smaller and more delicate details with size1.1-1.2.
· Be confident on your lines! Try to make them in a single motion.
In the end, you should have something like this:

Now, to fusion all of the layers without actually merging them, select the last layer of your lineart...

...and on the layer button, press the “Add layer from canvas” option. You’ll have your lineart in a single layer without losing the others. (Just make sure to have all of the other layers hidden)

The next part is coloring. Pick the colors you want and start applying them. Using the bucket tool is a great idea too; this time you won’t have to worry about shitty pixelated blank spaces or the color going everywhere.

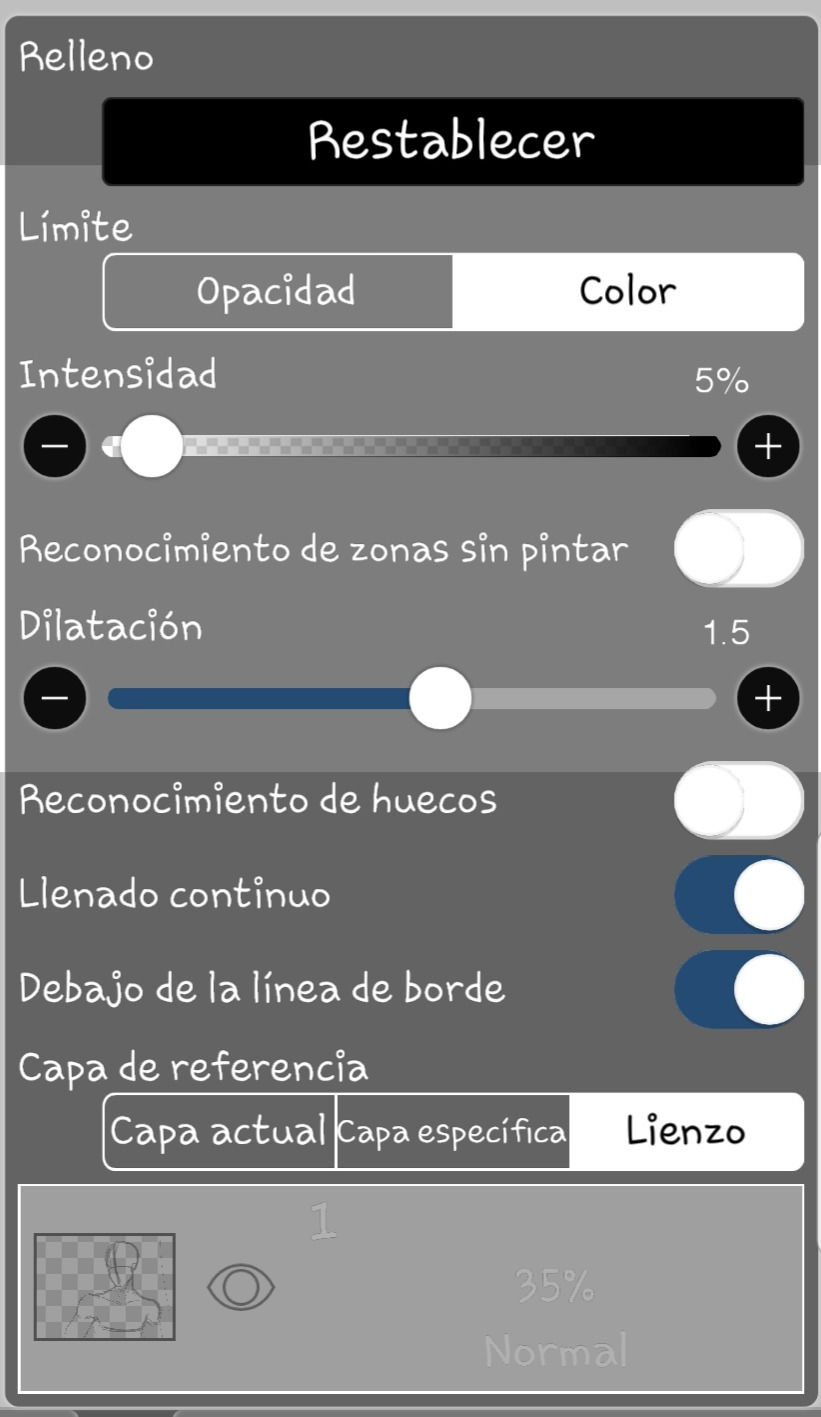
I have my bucket tool with these settings, so give it a try!

Anyways, now that you have your colors, it’s time to shade. Now, the best thing about anime is that animators care more about, well, animating than shading lmao Here, let me show you some examples of that.


As you can see, the shading isn't really that exagerated or dramatic. Of course, it’s also about (budget) the style and theme of the animation. Five nights at Freddy’s is an indie horror game, so I thought about a simplistic style for shading, focusing more on dramatic shadows and this character’s bright shitty pupils.
So, add a new layer on top of the one with the base color and apply the multiply option to the first. Use the base color on that layer- you’ll see that the color is darker.

Usually, I like to brighten the color a little bit, so details are still visible. Now, on to the shading technique. As you saw in the examples above, shading is really minimal here, so a few tips for how shadows work:
· Shade under the chin (almost like the shape of a triangle).
· Shade the skin under the hair.
· For clothes, add a simple shadow on the borders of them.
· For hair, shade where the locks of hair fall on top of others.

Alright, now that we got the shade as well, it’s time to use Ibis’ tools.

Hide the layer with the lineart- this will leave only the colors. Next, add a layer from canvas and press the fx tool, tap on the “Artistic” option and pick
the “anime background” tool.
This is where you have to consider if your character will be in a bright or dark background. Puppet is in a dark pizzeria, so I’ll go more for a night color (meaning I’ll put the first filter closer to the right). Also, make sure to put the very last filter on 0. You can also mess with saturation and brightness, tho in this case I lowered a little the saturation. So, technically, this filter kind of transforms your colors into an “anime palette”.

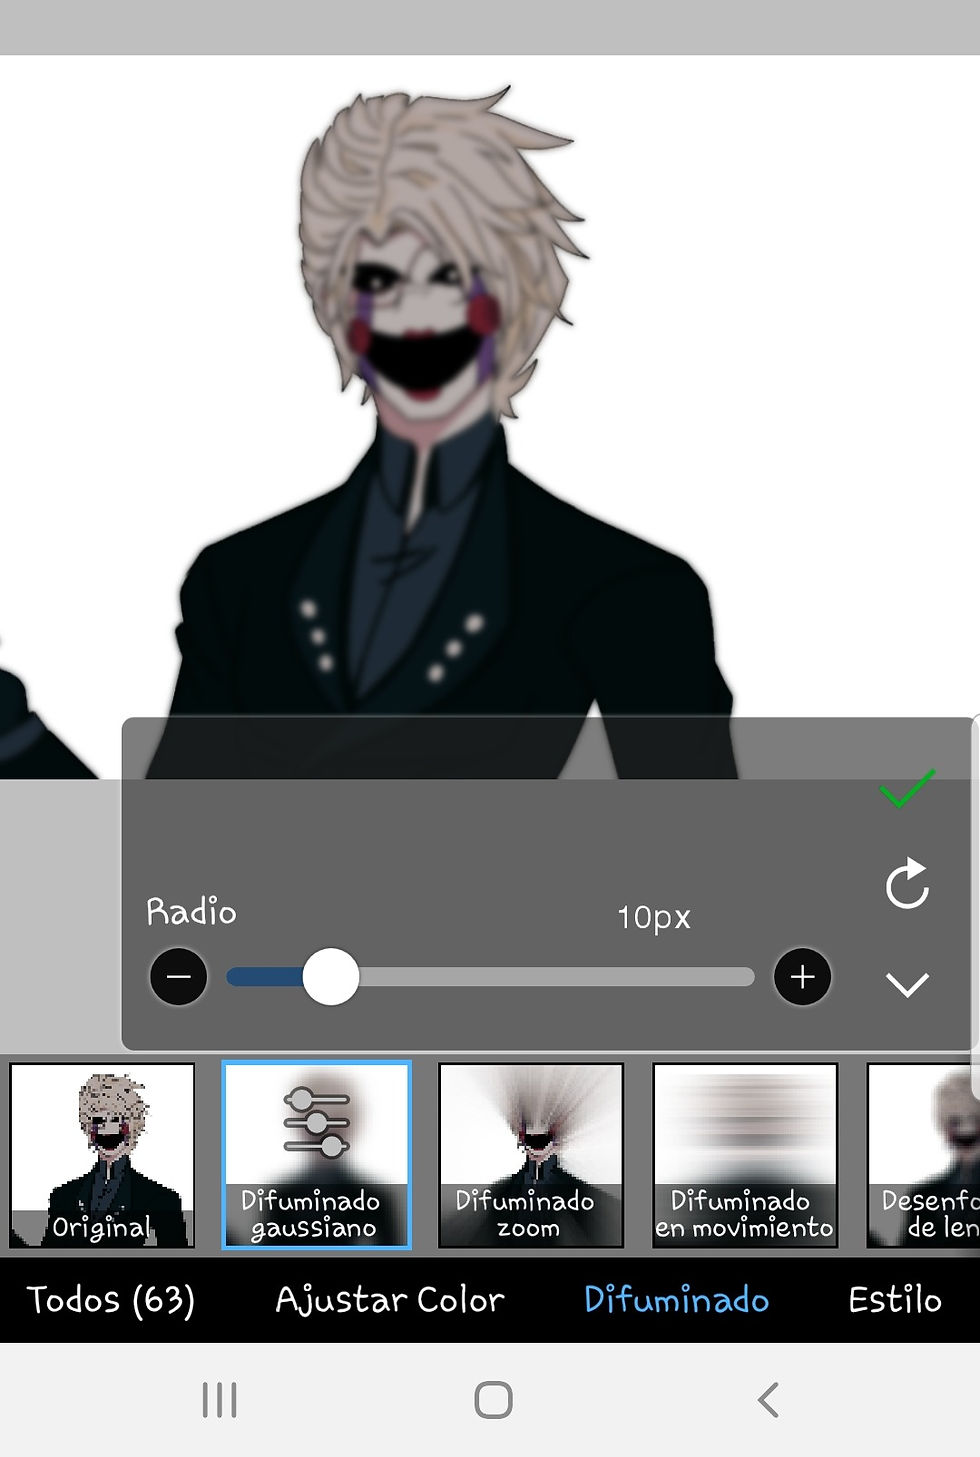
Now, add a layer from canvas using both the lineart and the colored layers. Go to FX filter and search for the gaussian blur- apply it to your drawing (10-13px).


Congratulations, you are shortsighted! X'D
Jk, now that you have your (blursed) blurred drawing, decrease the opacity to 45-48%.

See how it’s starting to look more anime-ish?

ewe Now for the next step: background. I’ll be honest, 50% of the time spent on this shit was because of my uselessness at doing a decent background X’D so, idk choose an anime background on ibis or download one from Saint Google lmao I gave up with this one and just decided to stick with shitty stars X’D Anyways, now that you have your background, the final step is lighting.
This was really hard for me as the ol’ man wouldn’t “blend” with the background. So, I just used the same shitty shading I always use for my normal drawings, which are basically like a terrible degraded color lmao (you can find them in my other tuto about color and shading xp)

You may ask, "why is there an extra layer with 55% opacity?". Let me explain. The light comes from the background which means that the light will hit Puppet, well, from behind. So I just duplicated the same layer and faded a little the outline so it would create some kind of "halo".

Now, set the opacities as the ones shown above and add another layer with the “soft light” mode, this will be for the hair highlights and add another one with the "add" mode (in my case) for Puppet’s glowing pupils. Make these highlights in a zig zag motion and add the black bars on the top and bottom of the canvas.


Finally, add subtitles with a cool dialogue and add a new layer- fill it with black and apply the noise filter (FX filter->artistic->Noise filter->strength 20%). Decrease the opacity of this last layer.

And there you have it! Your own fake anime screenshot! (:

Hope this helped you! If you have questions about this tutorial or Ibis, let me know!
:)


Comentarios